
Crafting a Space That Inspires
Your art studio isn’t just a workspace—it’s your sanctuary, your laboratory, and the birthplace of your creative ideas. Setting up a studio is an exciting step, but it can also feel overwhelming. Where do you start? What do you need? How can you create a space that nurtures your creativity while remaining functional?
I’ll guide you through the process step by step, combining practicality with personalized touches to craft the studio of your dreams.
—
1. Define Your Space
First things first: find your spot. Whether it’s a spare room, a corner in your living area, or even a repurposed garage, your studio can adapt to your circumstances.
Personal Insight:
I transformed a sunny nook in my one-bedroom apartment into my mini studio. With a small desk and a few shelves, I created the perfect spot for sketching and painting. It’s amazing how a well-utilized corner can become your favourite creative space!
Key Tip:
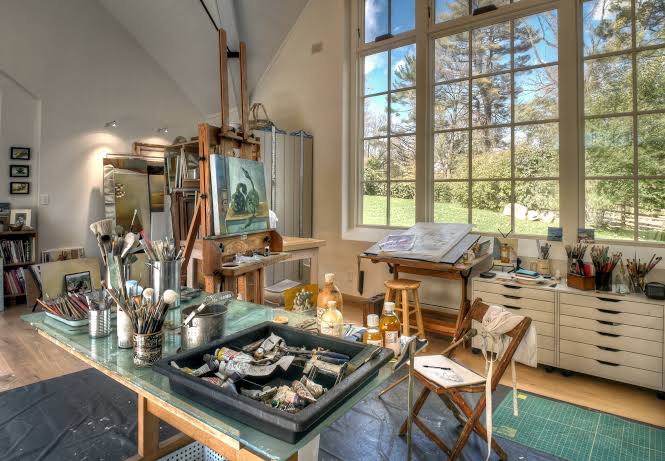
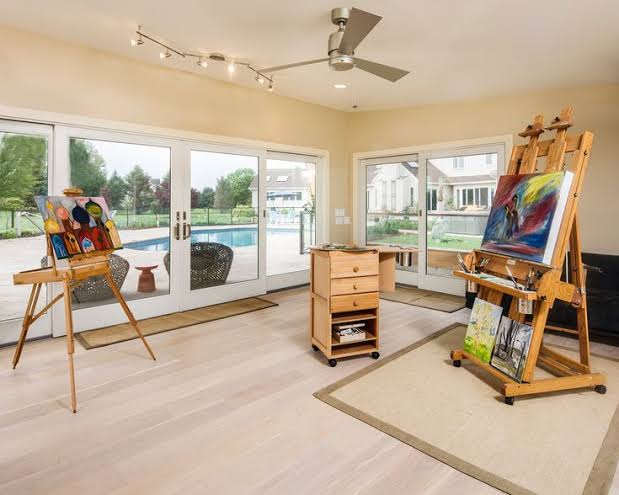
Natural light is gold for an artist. Choose a space with windows if possible. If not, invest in high-quality daylight bulbs to mimic natural lighting.
—
2. Tailor It to Your Medium
Your medium determines much of your setup.
Painters: You’ll need an easel, a sturdy table, and space to store brushes, paints, and canvases.
Sculptors: Look for durable work surfaces, tool storage, and enough room for larger projects.
Digital Artists: A desk for your computer or tablet, ergonomic seating, and proper lighting are essential.
Example:
A watercolor artist might prioritize flat workspaces with drawers for paper storage, while an oil painter might focus on vertical easels and wall-mounted racks for drying canvases.
—
3. Organize for Efficiency
Clutter can stifle creativity. Keep your tools accessible yet organized.
Shelving: Use open shelves for easy access to frequently used supplies.
Containers: Transparent bins or jars help you see materials at a glance.
Pegboards: Hang tools, brushes, or scissors for a functional and visually appealing setup.
I once had a bit of a challenge locating my favorite brush while I was immersed in painting, as my supplies were all over the place. But then I added a pegboard to my workspace, and what a game-changer! Not only could I find everything with ease, but the whole organizing process turned into a delightful experience that felt like creating art in itself. It brought me so much joy to see my tools in their perfect spots, ready to spark creativity!
—
4. Invest in Quality Furniture
Comfort is key when spending hours in your studio.
Seating: Choose an adjustable chair with lumbar support.
Work Surfaces: A sturdy table or desk that suits your height will prevent strain.
Storage: Cabinets with wheels offer mobility and versatility.
View your furniture as essential partners in your creative journey. They are not just objects; they are vital supporters that will elevate every masterpiece you create.
—
5. Light It Right
Lighting can make or break your workflow.
Natural Light: Position your workspace near a window for the best light.
Artificial Light: Use adjustable lamps with daylight bulbs to reduce glare and shadows.
Accent Lighting: Consider string lights or a small lamp for a cozy, inspiring atmosphere.
In Scandinavian design, lighting is seen as an integral part of mood and productivity. Adopting this approach can transform your studio into a serene, well-lit haven.
—
6. Personalize Your Space
Your studio should feel like an extension of yourself. Add elements that inspire and comfort you.
Artwork: Display your past creations or prints by artists you admire.
Plants: Greenery not only beautifies but also purifies the air.
Mood Board: Pin photos, swatches, or sketches that spark ideas.
In my studio, a small shelf showcases souvenirs from my travels—such as a carved figurine from Ghana and a luxurious silk scarf from India. These items are a constant reminder of the powerful stories I am eager to convey through my art.
—
7. Manage Mess with Ease
Art can be messy, but cleanup shouldn’t be stressful.
Flooring: Opt for easy-to-clean materials like vinyl or linoleum. If you rent, use drop cloths.
Sink Access: If possible, set up near a sink for quick cleaning of brushes and tools.
Trash and Recycling: Have separate bins for waste and materials you can repurpose.
Quick Tip:
Keep baby wipes or reusable cloths on hand for quick cleanup of spills and smudges.
—
8. Create Zones
Divide your studio into areas for different tasks.
Work Zone: Your main creative area with tools and materials.
Storage Zone: For keeping extra supplies and finished pieces.
Relaxation Zone: A comfy chair or mat for brainstorming or taking breaks.
Imagine your studio as a vibrant stage, brimming with creativity! Each zone is like a lively scene, full of possibility, and you’re the dazzling star performer, gracefully transitioning between them with joy and enthusiasm. Embrace the magic of your space and let your creativity shine!
—
9. Plan for Growth
As your artistic journey evolves, so will your studio needs. Choose modular furniture and flexible layouts that can grow with you.
When I began sculpting, I confidently integrated a foldable workbench into my studio. Its portability seamlessly enhanced the space without the need for a complete overhaul.
—
10. Test and Adjust
Your first setup doesn’t have to be perfect. Use your space and tweak as you go.
Tip:
Reflect on what’s working and identify what’s holding you back. Trust your creative instincts; they will lead you to the most effective setup for your success.
—
Final Thoughts
Setting up your art studio is an intimate process. It’s not just about creating a functional space; it’s about crafting an environment that nurtures your unique artistic voice. Whether you’re working in a sprawling studio or a cosy corner, remember: it’s not the size of the space but the heart you bring to it that truly matters.
What does your dream studio look like? Share your vision in the comments—I’d love to hear how you’re making your creative space your own!
