
Resin art is a versatile and mesmerizing medium that allows artists to create glossy, transparent, and beautifully layered pieces. Whether you’re crafting coasters, jewelry, or decorative wall art, resin is a rewarding material that provides endless creative possibilities. Let’s dive into the basics and techniques to get started!
Why Resin Art?
Resin art is beloved for its high-gloss finish and durability. It’s commonly used in:
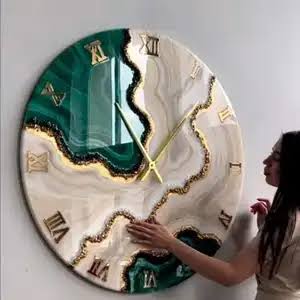
✅ Functional home décor – Coasters, trays, clocks, and furniture pieces
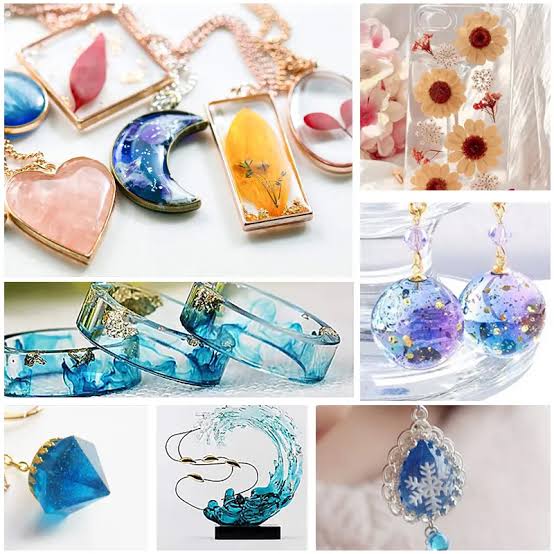
✅ Jewelry and accessories – Earrings, pendants, rings, and charms
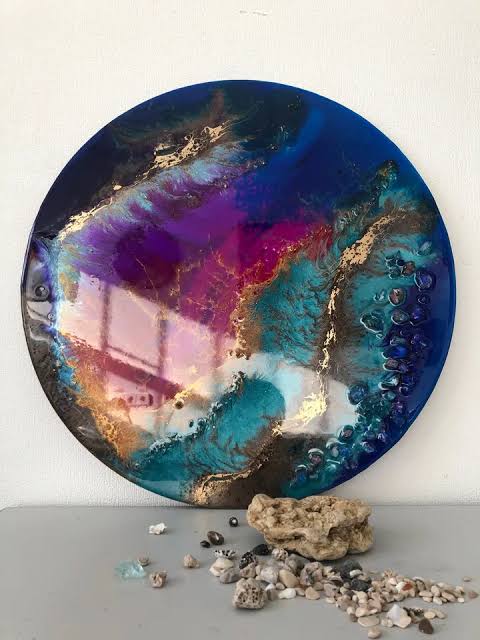
✅ Abstract and ocean-inspired art – Wave effects, geodes, and fluid designs
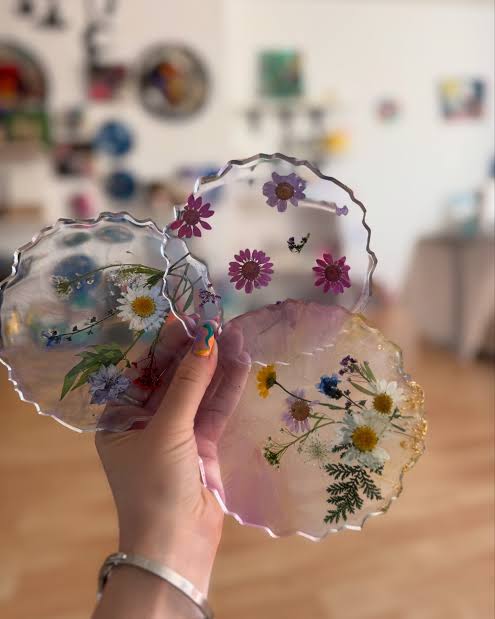
✅ Mixed-media projects – Combining resin with wood, dried flowers, and pigments
What You Need to Start
Before working with resin, gather these essential materials:
🧪 Epoxy Resin & Hardener – Choose high-quality resin for clarity and minimal bubbles
🎨 Pigments or Alcohol Inks – Adds color effects and depth
🌿 Silicone Molds – Ideal for shaping coasters or jewelry pieces
✨ Glitter, Metallic Powders, or Dried Flowers – Enhancing designs
🧤 Gloves, Mask, & Mixing Tools – Safety first! Resin requires proper ventilation
💡 Pro Tip: Ensure you’re working on a flat, dust-free surface—resin picks up small particles easily!
Step 1: Mixing & Pouring Resin
The mixing process is crucial to achieve clear, bubble-free resin:
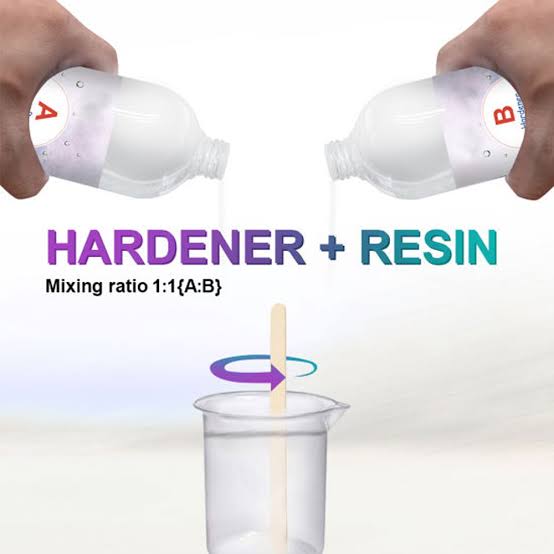
- Measure resin and hardener according to instructions (usually a 1:1 ratio).
- Mix slowly for at least 3 minutes to avoid bubbles.
- Add pigments or decorative elements for customization.
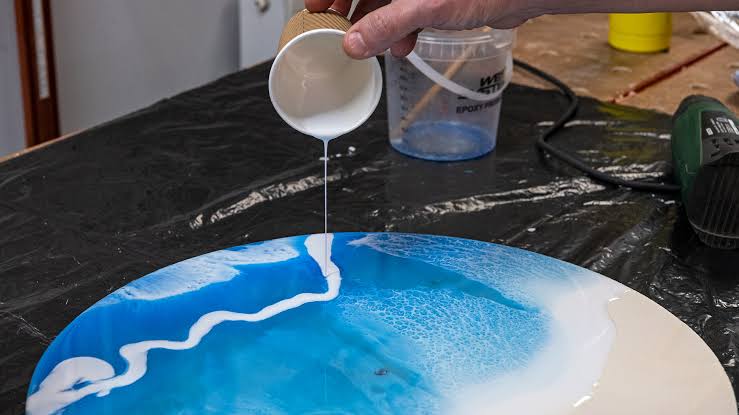
- Pour into a mold or tray, ensuring an even spread.
🎨 Tip: If bubbles appear, use a heat gun or a lighter gently over the surface to remove them!
Step 2: Creating Stunning Designs
Resin allows for fluid movement and layered effects:
- Swirling Pigments – Add two or more colors and use a toothpick to create swirls.
- Gold Leaf or Metallics – Sprinkle metallic accents for a luxurious feel.
- Ocean Wave Technique – Use white ink and blow air to mimic crashing waves.
- Geode Effect – Layer resin with glitter and crystals for a gemstone-inspired design.
💡 Experiment with textures! Resin interacts beautifully with different materials like wood, stones, or acrylic paint.
Step 3: Curing & Finishing Touches
Resin requires proper curing time to harden correctly:
✔ Let pieces cure for 24–48 hours in a dust-free space.
✔ Sand edges if needed for a polished look.
✔ Apply a top coat if extra gloss is desired.
✔ Attach jewelry hooks or protective pads to complete functional art pieces.
Final Thoughts: Endless Creativity in Resin
Resin art is an exciting way to experiment with colors, textures, and forms. Whether you’re crafting small accessories or large artistic pieces, the process is rewarding, unique, and limitless.
🎨 Ready to try it? Mix, pour, and let your creativity flow—one glossy layer at a time!
