
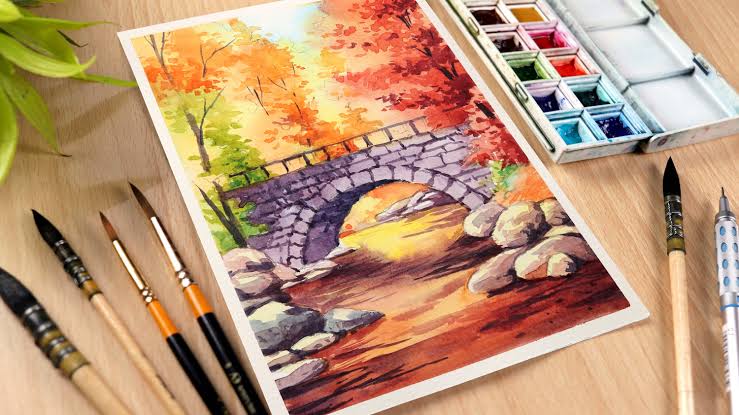
Watercolor painting is a beautiful and versatile art form that allows you to create vibrant, flowing artwork with minimal supplies. If you’re new to watercolors, these easy techniques will help you get started and build confidence in your painting skills. Let’s dive in!
1. Understanding Your Materials
Before we explore techniques, it’s important to familiarize yourself with the essential watercolor supplies:
- Watercolor Paints – Available in tubes or pans, with various transparency levels.
- Brushes – Round brushes (sizes 4-8) are great for beginners, while flat brushes help with washes.
- Watercolor Paper – Choose cold-pressed (textured) or hot-pressed (smooth) paper, ideally 140lb or heavier.
- Palette & Water Jars – For mixing colors and cleaning brushes.
- Masking Tape & Paper Towels – For clean edges and controlling excess water.
Now that you have your materials, let’s explore some beginner-friendly techniques.
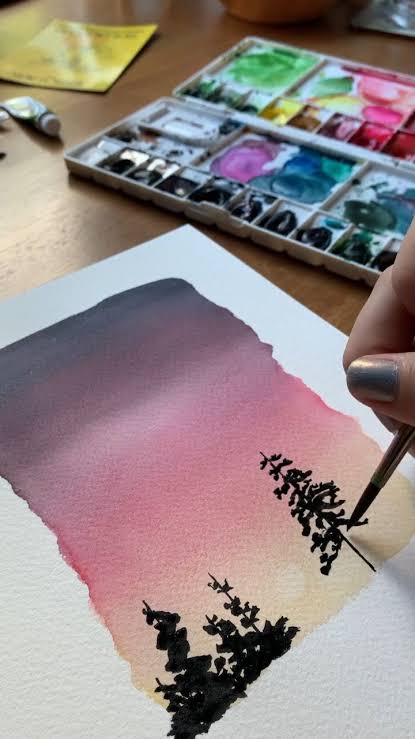
2. Wet-on-Wet Technique
This method creates soft, blended colors and dreamy effects. Here’s how to do it:
- Wet your paper with clean water using a brush.
- Load your brush with pigment and gently touch it to the wet area.
- Watch the color spread organically for a soft, gradient effect.
- Experiment by adding different colors and letting them mix naturally.
Pro Tip: Use this technique for painting skies, water, or abstract backgrounds.
3. Wet-on-Dry Technique
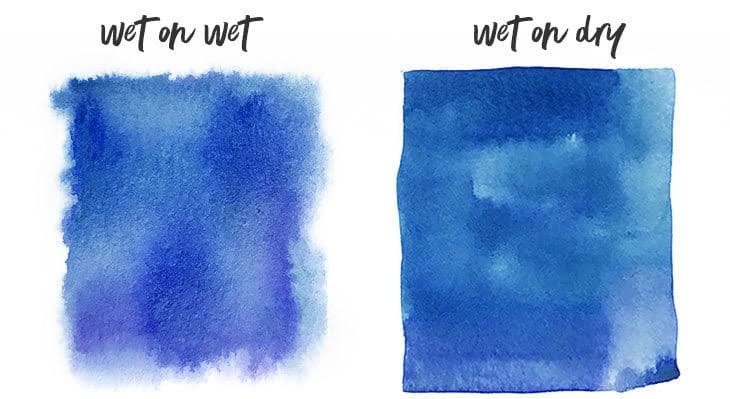
For sharper edges and more control, try painting with a wet brush on dry paper:
- Dip your brush in water and mix it with pigment.
- Apply it directly to dry paper for crisp, defined shapes.
- Layer colors once the first layer is dry to build depth and dimension.
Best For: Painting details, leaves, and controlled color transitions.
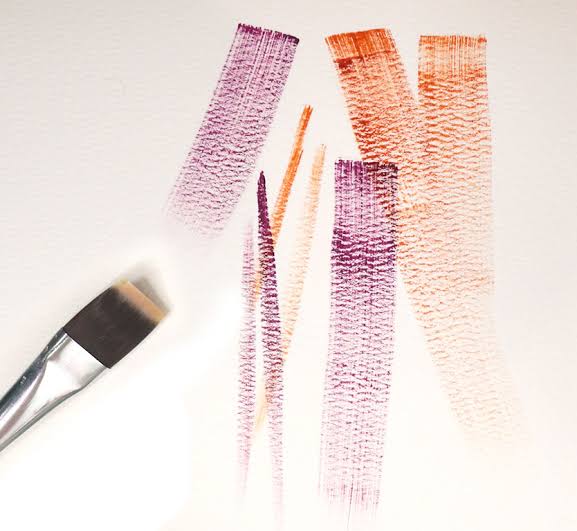
4. Gradient & Color Blending
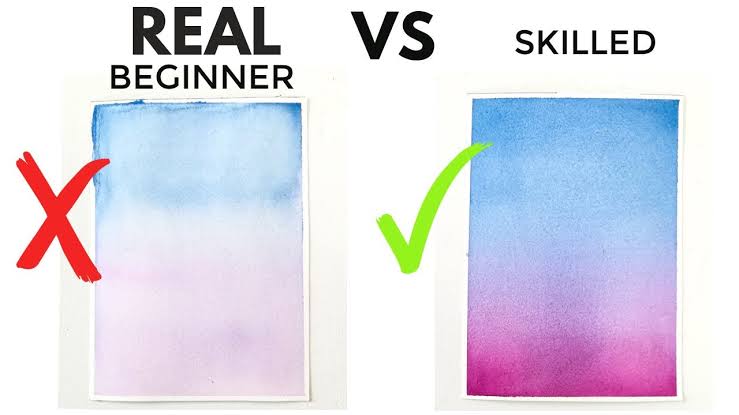
Blending colors seamlessly is a key skill in watercolor painting. Try this simple exercise:
- Start by painting a single color at full intensity on one side.
- Gradually add water to your brush as you move across the paper.
- The color should fade smoothly into a lighter shade.
- You can also blend two colors together, letting them meet in the middle for a seamless transition.
Practice Idea: Create sunset skies by blending warm hues like yellow, orange, and pink.
5. Dry Brush Technique
If you want a textured, rough effect, the dry brush method is perfect:
- Use a brush with very little water and paint.
- Drag it across dry paper for a scratchy, grainy look.
- This technique is ideal for painting tree bark, grass, or fabric textures.
Bonus Tip: Try using different brush angles for varied textures.

6. Salt Texture Magic

For a unique, organic texture, sprinkle salt onto wet paint and watch the magic happen:
- Paint a wet wash on your paper.
- While it’s still damp, sprinkle table salt over the area.
- Let it dry completely before brushing off the salt to reveal starburst-like patterns.
Perfect For: Creating interesting textures in galaxies, underwater scenes, or abstract backgrounds.
7. Lifting & Erasing Mistakes
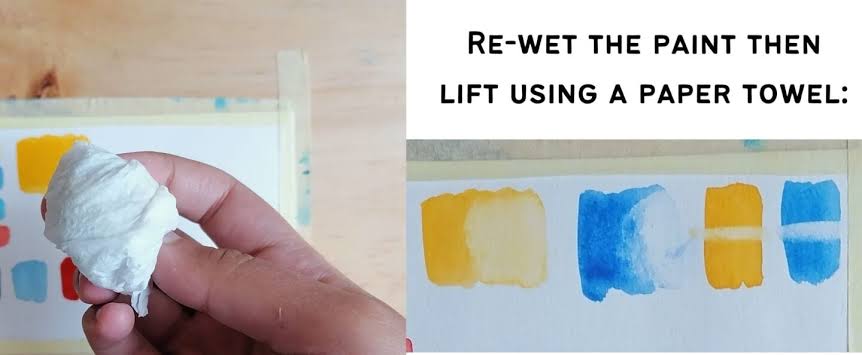
Watercolors may seem unforgiving, but you can correct mistakes:
- While the paint is still wet, blot with a tissue to lift excess color.
- If dry, use a damp brush to gently scrub and lift the pigment.
- Magic eraser sponges can also help with minor corrections.
Great For: Fixing highlights, clouds, and accidental overpainting.

Final Thoughts & Next Steps
The best way to master watercolors is through practice and experimentation. Try these techniques on small swatches before applying them to a full painting. Don’t be afraid to mix and match methods to develop your unique style!
Are you ready to create your first watercolor masterpiece? Grab your supplies and start experimenting today!
Looking for more art tutorials? Check out our Global Art Forms section: https://worldwideartadvocacy.wordpress.com/global-art-forms/
Want to showcase your work? Submit your portfolio here: https://worldwideartadvocacy.wordpress.com/submit-your-portfoliosubmit-your-portfolio-worldwide-art-advocacy/
